


1 TIP AND TRICK - We show you how to adjust the brake and clutch levers and throttle lever correctly!
We present you 5 TRICKS and TIPS on how to take care of your motocross bike.
In cooperation with Roman Jelen , a former motorcycle rider with many flattering achievements, we have prepared a series of interesting tips and trick on how to set up your MX bike in just 5 steps.

With this project we are expanding our commitment to Moto Tools and their users. Our vision in moto sport is stronger than ever. We are cooperating with the best-in-class partners, developing great innovative solutions, and reached to new markets and users every day.
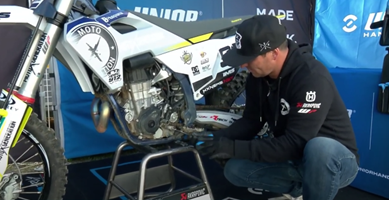
We are always focusing on our users, so we created a useful and effective series of videos, where you will find useful tips directly from former motorcycle racer and owner of motorcycle school Roman Jelen. He will show you all the essential tips and tricks together with some useful thoughts that will help you become better and more efficient racer. This is the first video where we will show you on how to properly set up your controls. Let's get started!
The first video in the '5 Top Tips to Set Up MX Bike' series focuses on motorcycle controls. It provides valuable information on how to adjust the brake and clutch levers, throttle cable, and other controls to ensure a safe and comfortable ride. Roman's expertise will showcase all the tips and tricks, and his easy-to-follow steps will equip you with all the necessary knowledge.
So, let’s follow Roman Jelen by watching the video or follow our steps in the blog below …
As mentioned, our FIRST VIDEO will show you how to proper set up the brake and clutch levers, throttle cable, and other controls. First, we will start with the upper and lower controls.
Why is this so important? Because we have 5 controls on the bike and without comfort of using all 5 controls, we cannot totally have control of our moto bike.
In the upper controls of the bike, we have the clutch which is very important on how to set up your levers. We have the left and the right one which is the front brake. First, we will start by adjusting these two levers. For this we will use Unior Socket wrench with T-handle and we will untight the eight screws on our moto bike just to change the position of clutch level. You must check if the clutch lever is too outside and put it a little bit inside. You need to have good position with your fingers when you hold the clutch otherwise, we need to adjust it. This is how we can use it better when we are riding our moto bike!
BE AWARE! It's a personal setting so every rider needs to adjust it according to its needs. Some like it a little bit lower and some higher. What is important is that we can use it normally with comfort and with two fingers that we can put easily on the lever.
For the front brake we will use the same Socket wrench with T-handle, dimension 8 mm, where we will do the same thing. First, we will untight it a little and then later prepare the position so that is comfortable for us. What is important here is that with the front brake we have good breaking power. So, we must again adjust it so that we can put two fingers on it and easily operate the break. The more we use fingers on the outside of the lever the more power we have. After you are done setting it just tight it back, strongly.
So, the last thing in the front part of our moto bike we will check the throttle controls. The throttle shouldn't have any free play. This means it needs to be tight. We need to take proper tools – I am using always Unior hand tools - and eliminate this problem! First you need to open the rubber so that you can reach the cables. Then you take the pliers and 10 mm wrench . With the pliers we untight the set and with 10 mm wrench we can adjust the full cable. Easy and simple! And now we have a little bit less free play of the throttle. This is also how you have a very good throttle control. At the end you tight it back with pliers and put the rubber again on.
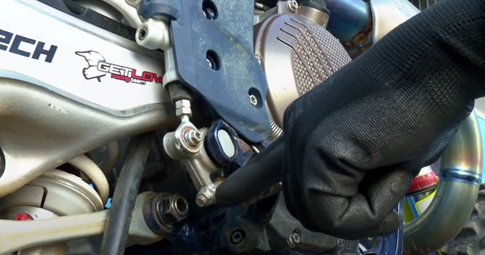
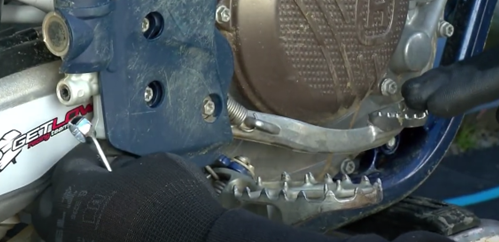
Let's go now to the lower part of controls which is the gear shifter. Here we will try to adjust our shift control and put it a little bit lower. This is something I see a lot of times with my riders, that they have it in the wrong position. If it is too high the rider will have a lot of difficulty to shift up the gear. This is why we will put it lower so that you can ride in a good rider’s position.
Here we will use Unior Socket wrench with T-handle, dim. 8 mm again and we will untight this lower screw.
Now we will take off the shift lever and we will adjust it two teeth lower.
When settled we will tight it back. Now you can see that our shift lever is even with our foot pack. And that is the base of having good control over our shifter. It also depends on what kind of boots you use. But in average this would be the best set up for your best moto riding style!
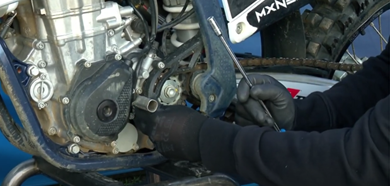
At the end we will also try to adjust the rear brake. In our case it is too low, so we will try to set it up a little bit higher. You must take two 10 mm wrenches and use tem both for untightening.
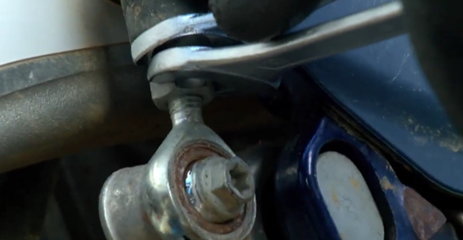
We will also untight the lower screw which gives us the possibility how high and low the pedal is.
Just try it then a little bit with your hands to see if the position is ok for you. At the end we can see that our brake pedal is higher than before, it is a little bit upper from our foot packs.
At the end the bike is ready to ride! Let's hit the track!
If you want to improve your riding techniques and properly set up your motorbike, be sure to subscribe to our email list, follow our Moto Tools social media profiles or participate on MX school. By doing so, you'll be the first to receive valuable tips, tricks, and solutions for this project.